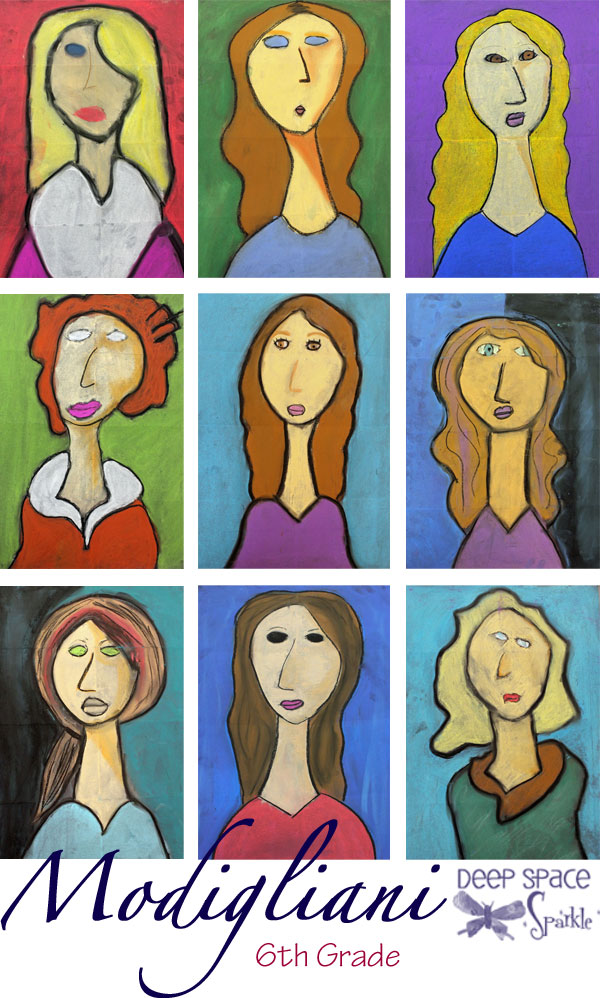
Modigliani's Elongated Faces.
I found this at Deep Space Sparkle.
I was quite excited. An Art lesson that can't fail. Every child will feel like an artist!
I decided to also through in the idea of complimentary colours. The background and shirt colour need to be complimentary.
Step 1:
I showed example to the class of what we were making. This gave students an idea of the features of artstyle - long neck, flat colours with some texture, proportion.
Step 2:
We then discussed the colour wheel and choosing appropriate colours. We looked at complimentary colours and named complimentary colours - red & green, blue & orange, yellow & purple. I explained that when they are used next to each other, they look brighter. This was shown on the IWB.
Step 3:
I was led to Kathy from the Art Project's fool-proof technique for making the outline. It worked like a treat. I also had this up on the Interactive Whiteboard.

I had some students press too hard.
Others I had to do for them, as they still needed practice using a ruler.

We went bit by bit starting with the head.
We looked at proportion of the head, where the chin is positioned on the lines.
I showed students how to lightly sketch, rather than drawing a continuous line for the head.
We then went to the neck, noting how the neck takes up the next quarter of the page.
Finally students did the shirt. Some had trouble with this as their shirt was too wide or not symmetrical.

The hair was fun to do.
Boys had extra fun with this and got creative in the hair style. Fringes, parts sticking up, spikey.

Finally, the face.
We looked at how the face was positioned and compared it to our own face.
Noses are long and take up much of the face.
Lips are near the chin.
Eyes sit under the forehead and in line with the top of the nose.
Step 4:
I explained to students how pastels can be used - on the sides, the tip. The were told they can smudge the chalk pastel, mix them gently and that the more pastel on the one spot the darker the colour will become.
Step 5:
Students paired up as they had to share the two complimentary colours (I only have a small supply of chalk pastels). They started on the background and the shirt. I was really impressed with how well they were working and how good the art pieces were already looking.
TO BE CONTINUED.....